Find and Merge Duplicate Salesforce Accounts with ZaapIT
Salesforce duplicate rules flag accounts that might be the similar details. With ZaapIT, you find duplicates that SF fails to find and then decide whether to merge them and which details to keep using smart rules.
Already have matches? Open the Duplicates Report. Looking for duplicates in older records or a recent import? Run an advanced scan. Both paths lead to the same review.

1. Open the accounts Salesforce flagged
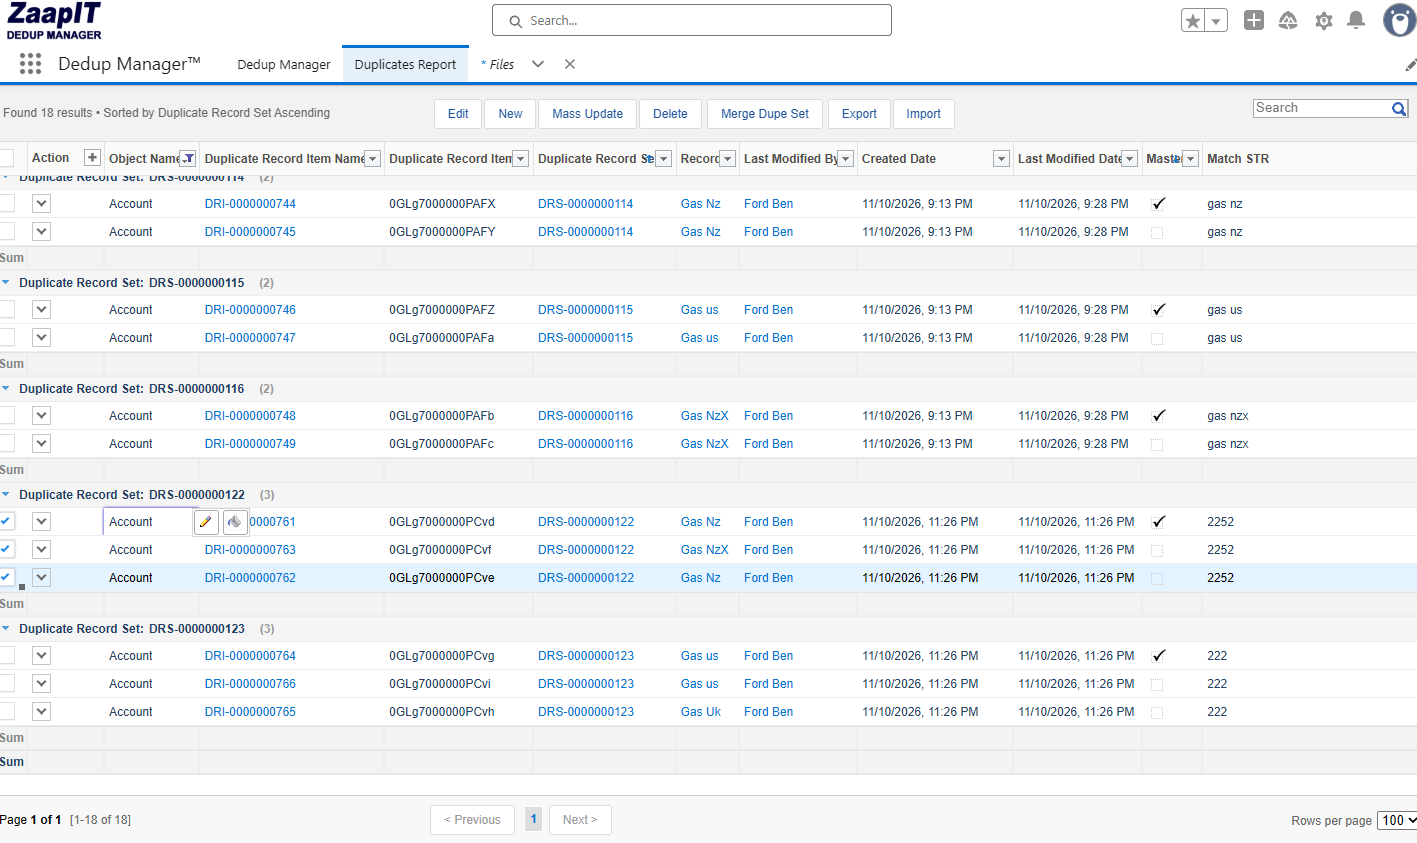
Open ZaapIT Dedup Manager → Duplicates Report. Each Duplicate Record Set is a group of possible matches. Expand one set and compare the account names. The checkmark under Master marks the account ZaapIT proposes to keep. If you recognize your set, skip to the merge review.
Expected a set here? In Salesforce Setup, open Duplicate Rules and check the active Account rule. Its matching rule defines which records look alike. If the duplicate rule allows the save and has Report selected for that action, Salesforce can record the matches in a set. See Salesforce’s duplicate rule settings and when duplicate rules run.
2. Run an advanced scan if you need more matches
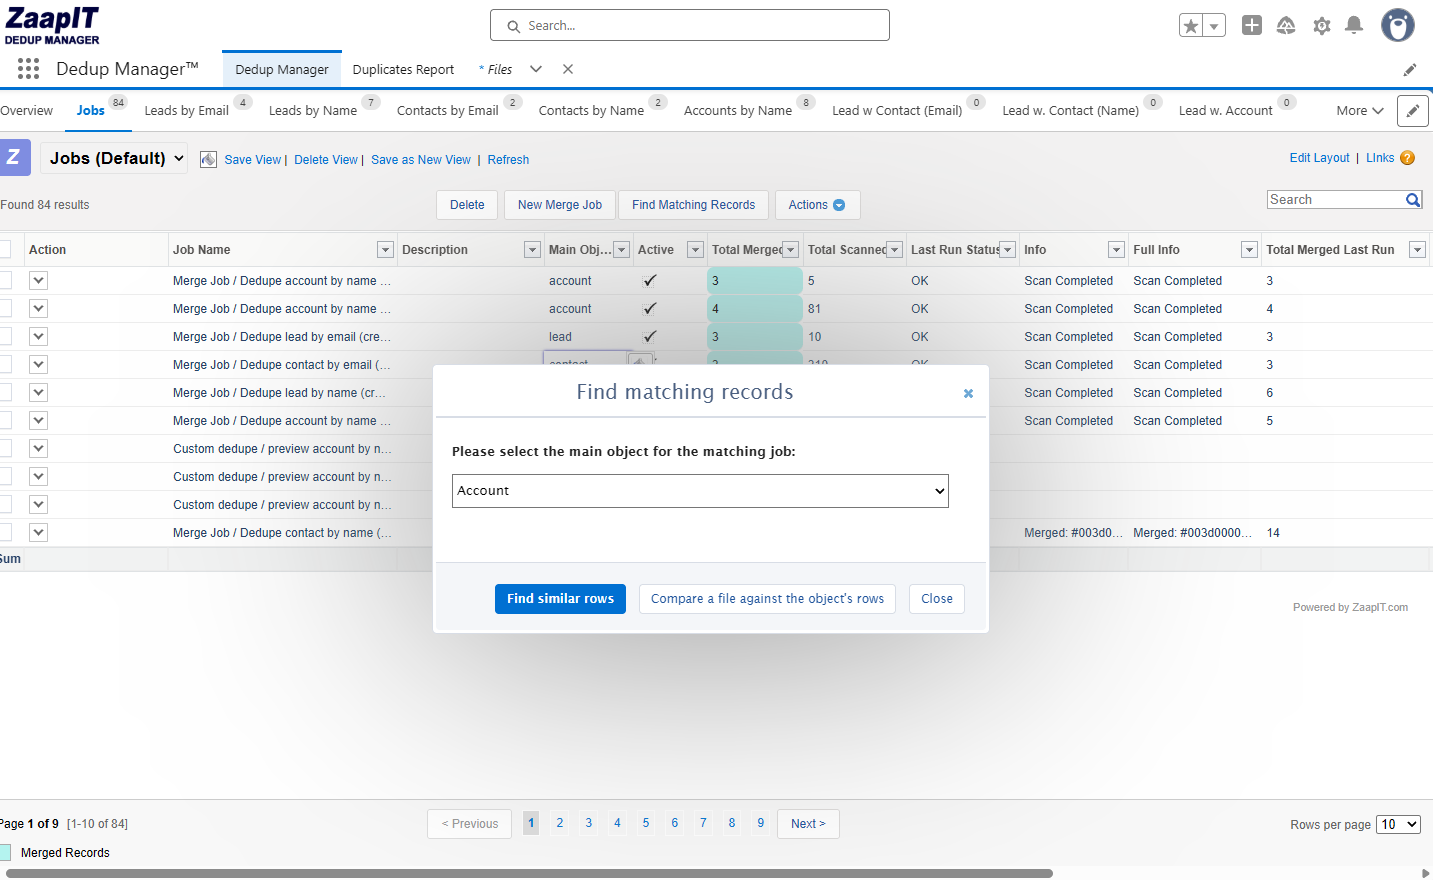
Open Dedup Manager → Jobs → Find Matching Records. Choose Account as the main object and select Find similar rows to compare accounts already in Salesforce.
Under Matching criteria, choose what two accounts must have in common. For example, look for a similar account name and the same billing postal code. Put both fields in one criterion so both must match. If an exact account number is enough on its own, add it as a separate criterion. Either criterion can then flag the pair.
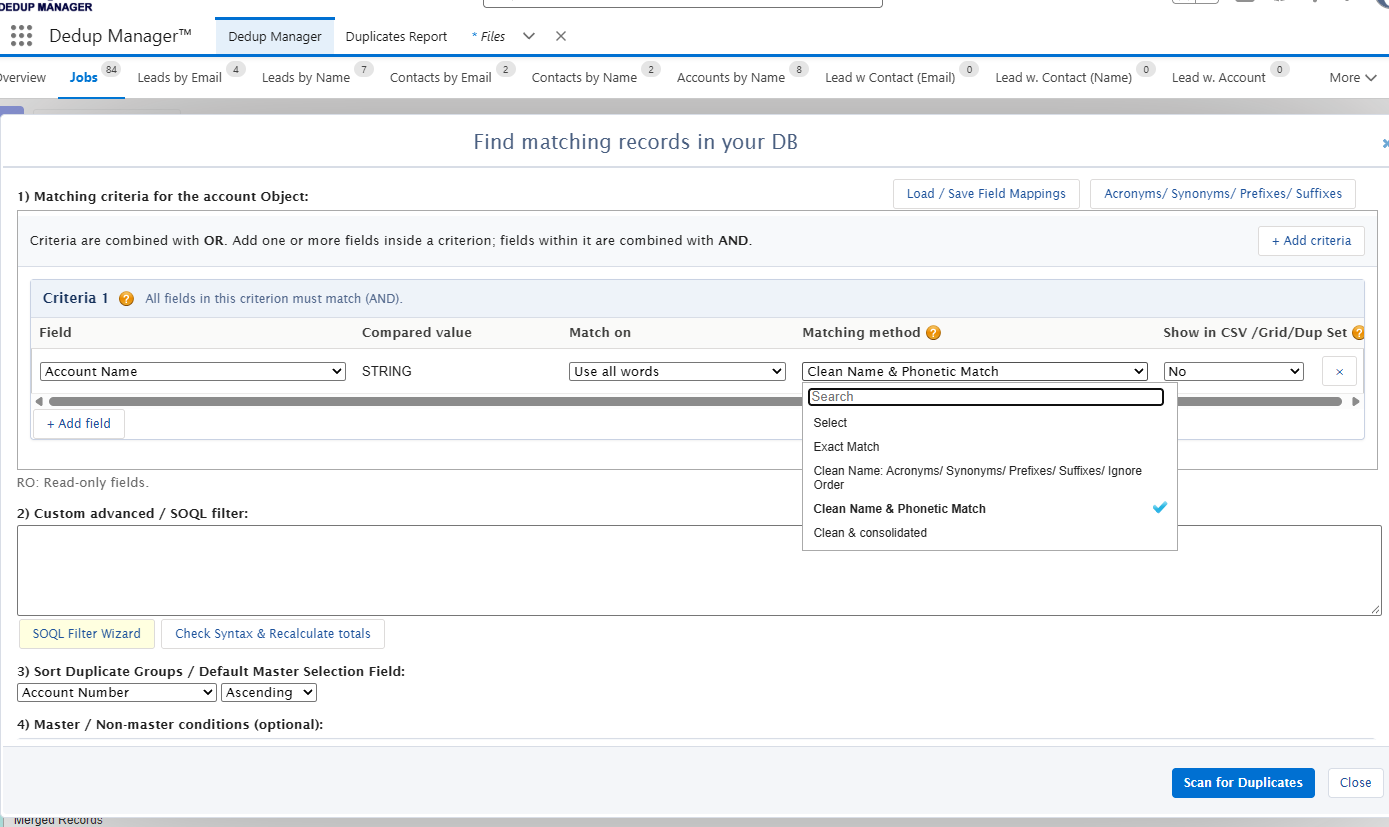
- Names sound alike? Choose Clean Name & Phonetic Match to find spelling variants such as “Smith” and “Smyth.” Check a second detail, such as the billing postal code, before deciding they are the same customer.
- The same number appears in different fields? Choose Clean & consolidated to compare fields together. A number in Phone on one account can match Alternate Phone on another. You can also use field consolidation for email addresses.
Find duplicate company accounts with Clean Name
Suppose four Salesforce accounts are named Cola inc, Main office Cola, Cola NY inc, and Cola llc. All four share the word “Cola.” The differences come from legal suffixes such as “inc” and “llc,” a location (“NY”), and an office label (“Main office”).
Choose Account Name as the field and Clean Name as the matching method, then run Scan for Duplicates. In this example, Clean Name detects the variations as possible duplicates with 30% or greater similarity. Open Preview Duplicates and compare the customer numbers or billing details. That check helps you decide whether “Cola NY inc” is another entry for the same customer or a branch that needs its own account.
Find the same person under a nickname
Suppose one contact is listed as Benjamin Ford and another as Ben Ford. Salesforce duplicate rules will miss that pair. The same applies to Alex Morgan and Alexander Morgan. Salesforce fuzzy matching can recognize some nicknames, so the results depend on your active matching rule. How Salesforce compares first names
To find these contacts in ZaapIT, choose Contact for the scan. Open Acronyms / Synonyms / Prefixes / Suffixes and include Ben as a synonym for Benjamin and Alex for Alexander. Use Clean Name on First Name and require an exact Last Name in the same criterion. ZaapIT can then flag both pairs for review. Compare a second detail, such as a verified email address, before deciding to merge.
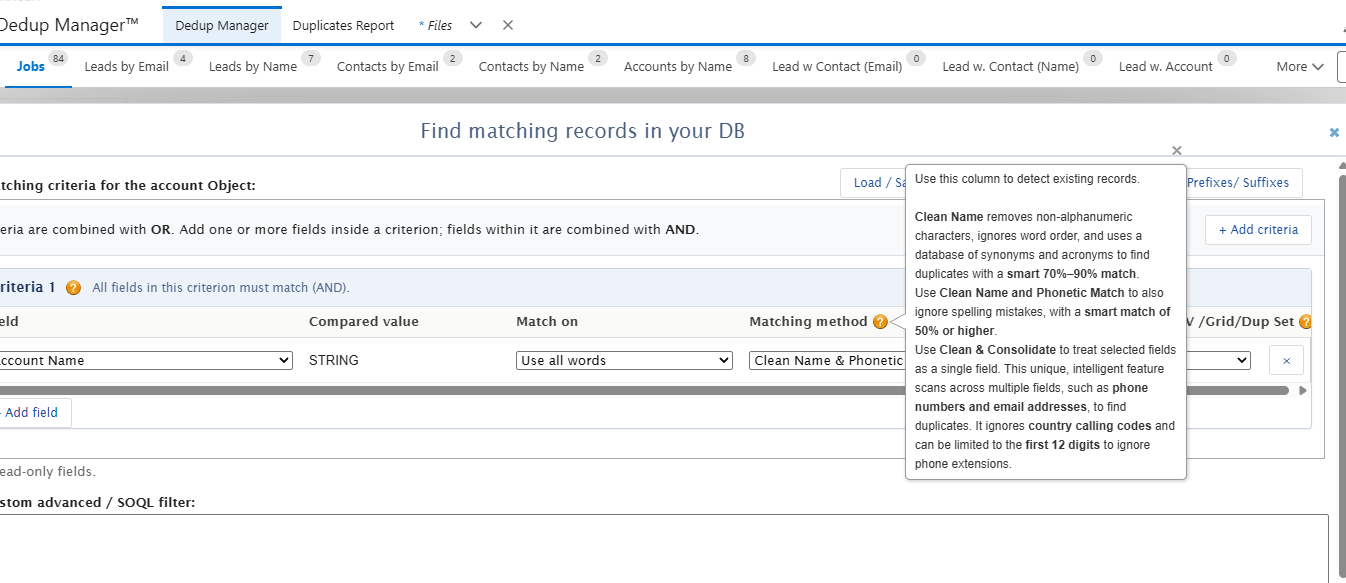
To limit the scan to part of the database, use the SOQL Filter Wizard or enter a filter under Custom advanced / SOQL filter. Select Check Syntax & Recalculate totals to check its scope. The Dedup Manager quick-start guide walks through a first scan.
Set a rule for which account to keep
Suppose an import created prospect accounts for existing customers. Use the new smart master selection condition if the customer account should always be the one you keep. Under Master condition, select Record Type ID and enter your customer record type ID. Under Non-master condition, enter your prospect record type ID. The scan then reports pairs where the customer and prospect each meet their condition.
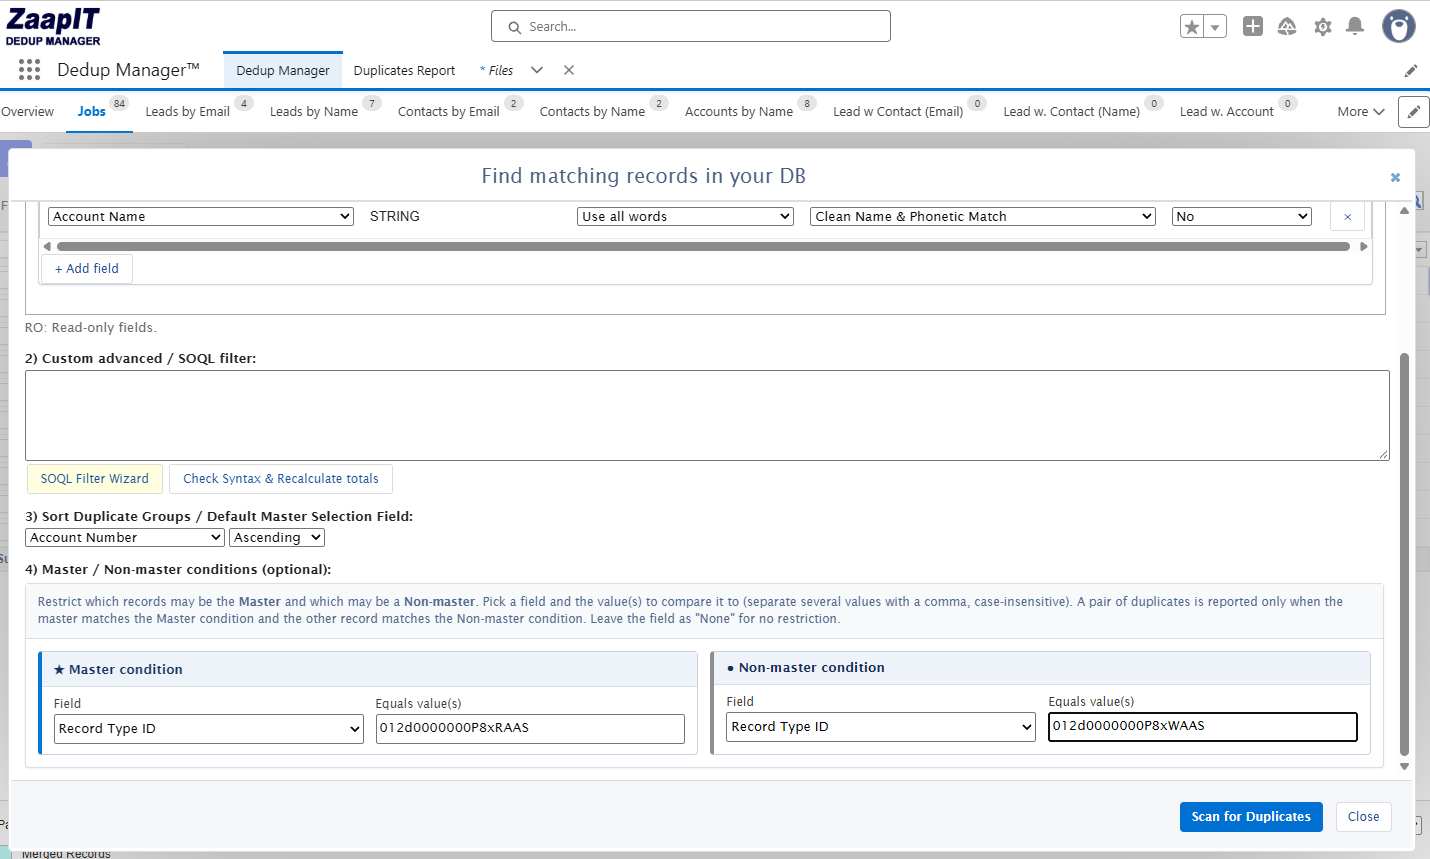
You can enter multiple accepted values for a condition, separated by commas. The comparison is case-insensitive. Leave a side set to None when every record is eligible for that role.
The Default Master Selection Field and its sort order set the default ordering. Use the conditions when eligibility depends on a value such as record type. Then select Scan for Duplicates.
Preview the scan and save the sets
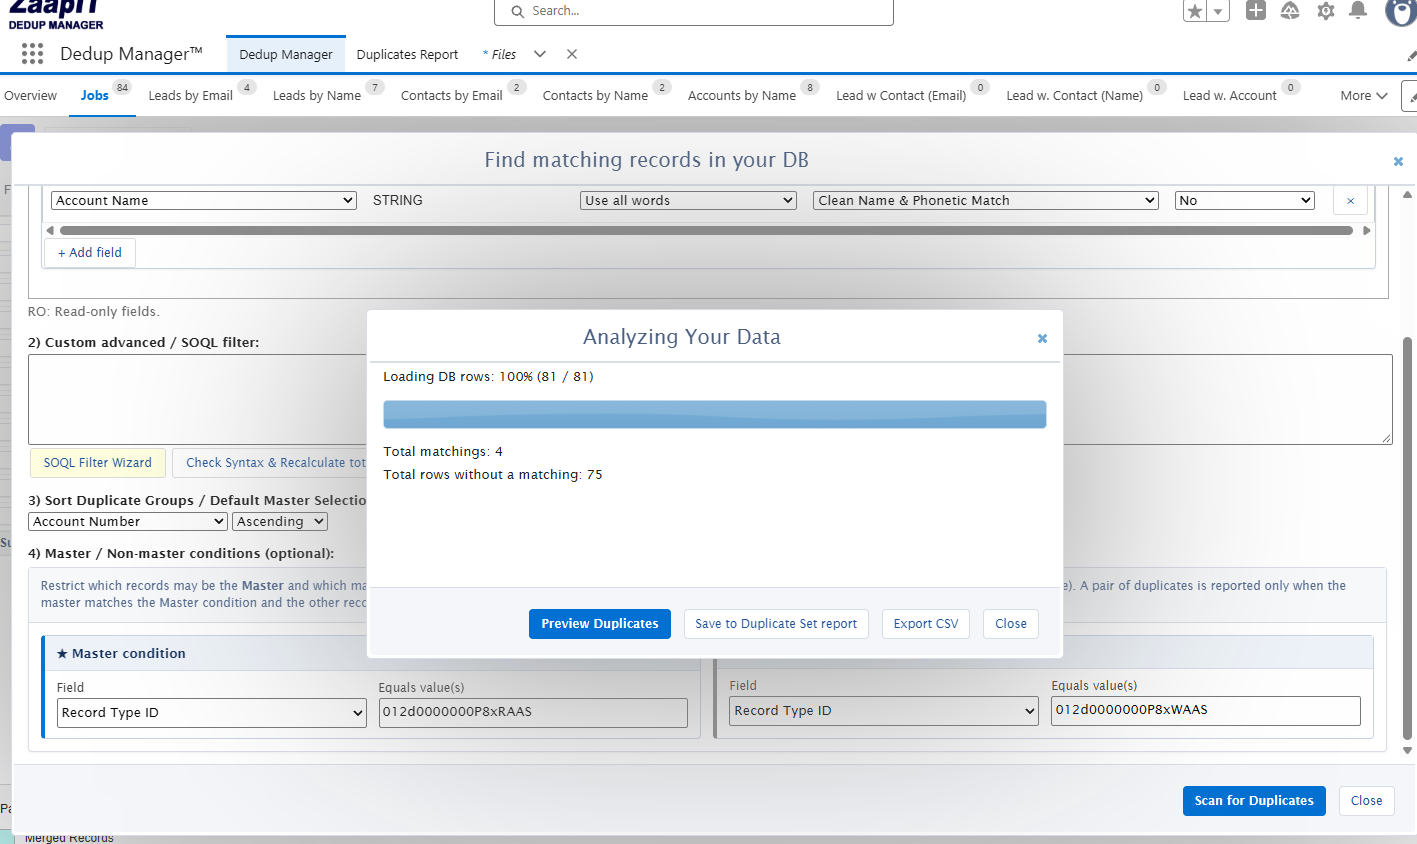
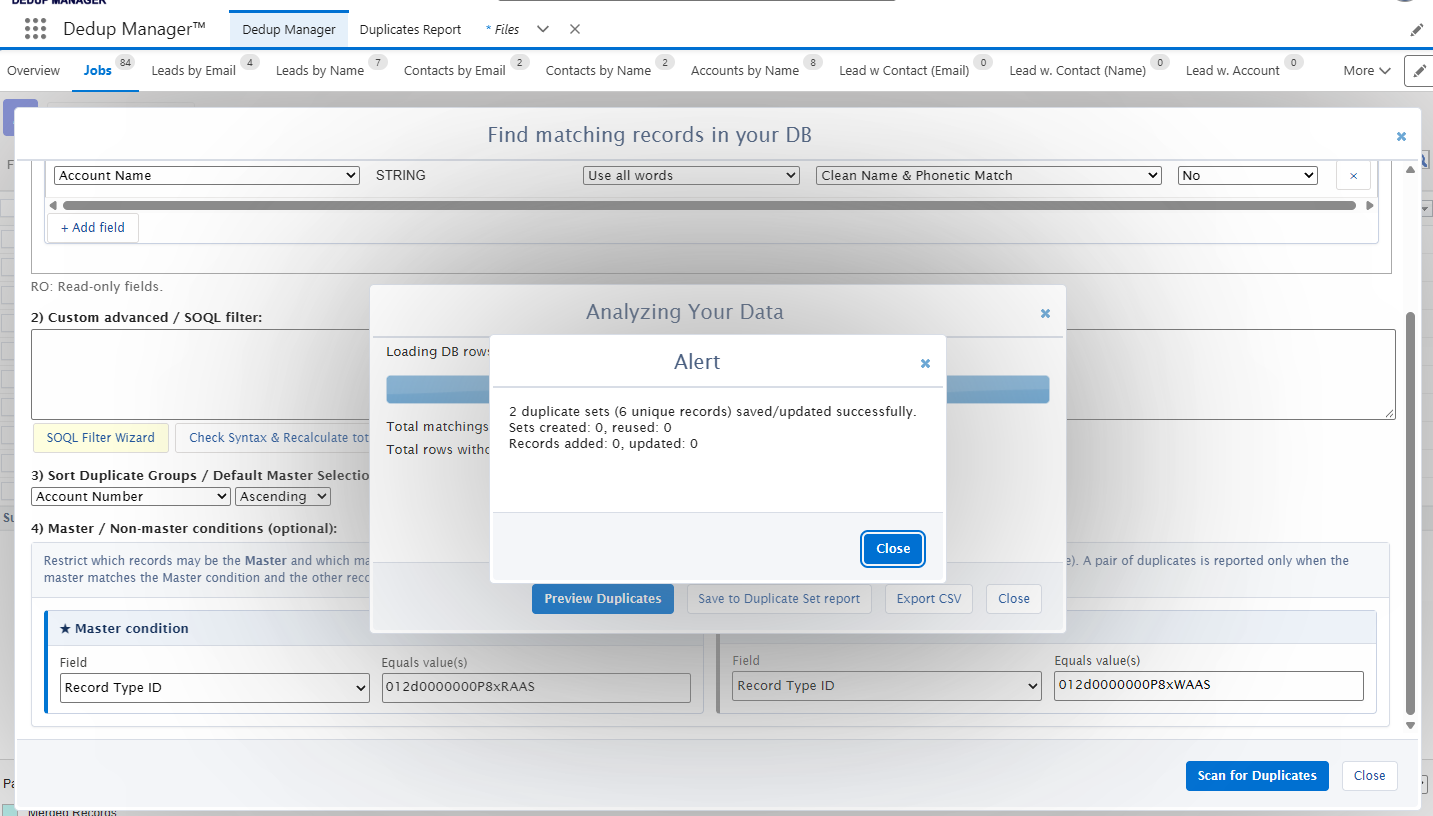
The example scan loaded 81 rows, reported four matches, and found 75 rows without a match. Choose Preview Duplicates to inspect the candidates, or Save to Duplicate Set report to make the groups available in the report. Export CSV gives you a file for offline review.
3. Choose the account and field values to keep
In Duplicates Report, select the records in a set and choose Merge Dupe Set. In Review duplicate Accounts, check which records have Merge selected, then confirm the Master. That choice determines which account survives. The Merge strategy column determines which values it receives.
- Copy if Empty keeps a populated master field and can fill a blank from another selected account. Use it for Account Description when you want to preserve a description your team already maintains.
- Keep Newest is useful for fields such as Account Phone when the newer record is the source you want to use. Check the selected value in that field’s row before merging.
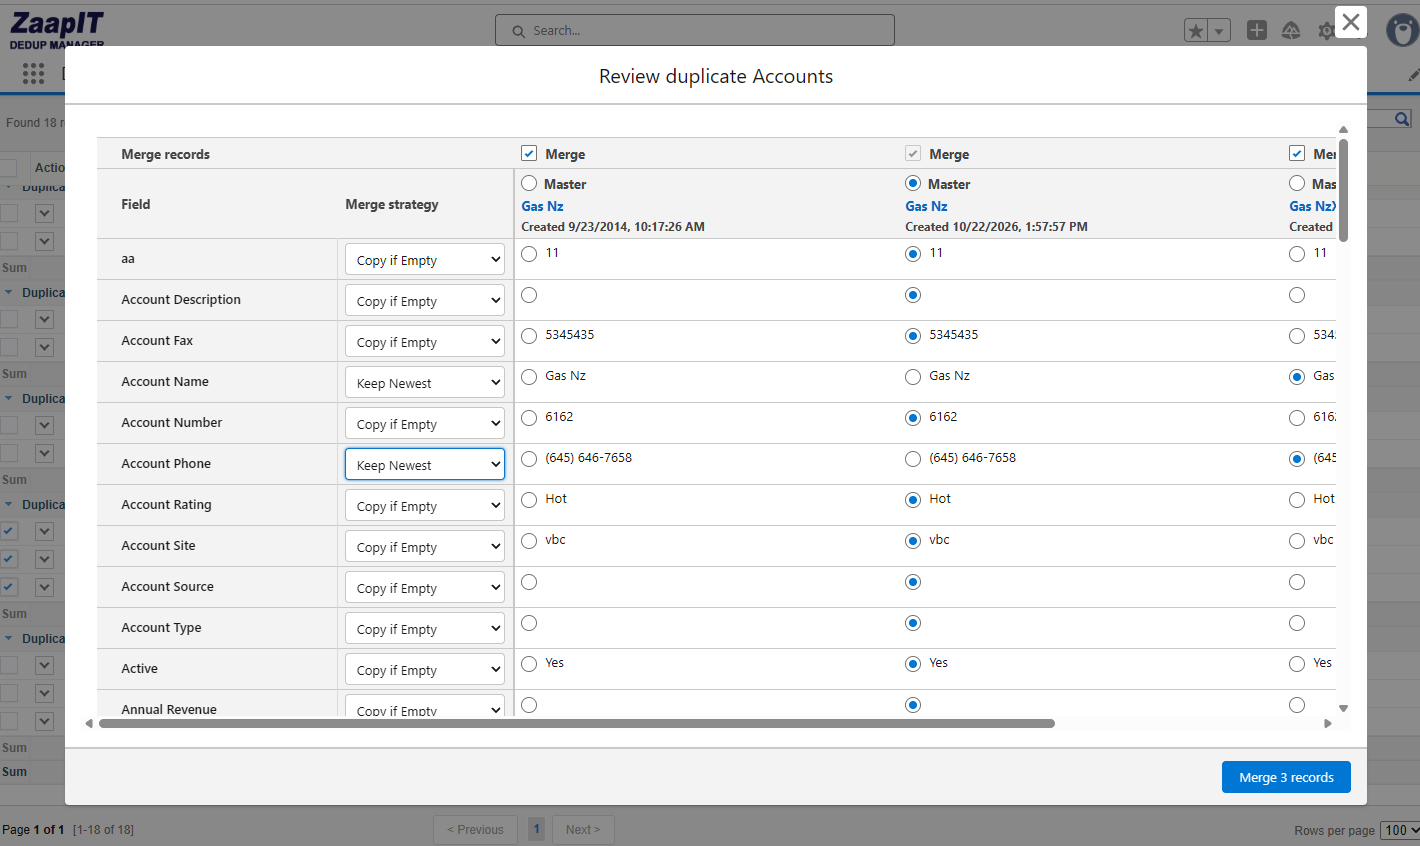
To override a proposed value, select the correct one in its row. Enable Undo and Restore before confirming the merge if you want a recovery file. Then choose Merge 3 records for the set shown above.
Use Quick Merge for sets that follow the same rules
Once you’ve confirmed the accounts belong to one customer, choose Quick Merge on the merge strategy report to apply your configured smart merge strategy. If the newest import contains an outdated number, open the detailed review and pick the verified number yourself. For guidance on handling multiple groups, see the ZaapIT mass merge tutorial.
4. Restore the original accounts if needed
If you discover that the merged accounts belong to two different customers, use the restore file ZaapIT created when Undo and Restore was enabled. It lets you recover the accounts, their field values, and the links to their related records. How ZaapIT merge recovery works

- Open Smart Mass Update → Files and select the Restore-Rows file for this merge. For a merge job, you can also find it under Dedup Manager → Jobs → Related Files.
- Check the file details, choose Restore Records, and confirm.
- Reopen each account and verify its phone number and related lists. Restore instructions in the ZaapIT user guide
Salesforce duplicate rules and Smart Merge FAQ
Open Duplicates Report in ZaapIT Dedup Manager. Each Duplicate Record Set groups the Salesforce records flagged together. Expand a set, select its members, and choose Merge Dupe Set to compare them.
Use Clean Name & Phonetic Match for names with similar pronunciations and different spellings. Use Clean & consolidated when the same phone number or email address may appear in different fields. Both methods identify candidates for review.
Yes, when record type distinguishes customers from prospects. Set the customer Record Type ID in Master condition and the prospect Record Type ID in Non-master condition. A pair must satisfy the matching criteria as well as both role conditions to appear.
Copy if Empty preserves a populated field on the master and can fill a blank from a duplicate. Keep Newest uses the value chosen by the recency strategy. Use the side-by-side preview to check which phone number or name will survive.
Use Quick Merge when you have confirmed the set represents one customer and your configured smart merge strategy gives the desired master and field values. Open the detailed review when a specific field needs an exception.
Yes, if Undo and Restore was enabled before the ZaapIT merge and its restore file is available. Select the corresponding Restore-Rows file, choose Restore Records, and verify the recovered accounts, field values, and related lists.
Try this with one duplicate set
Choose two accounts your team knows well. Preview the master, description, and phone number, then verify the restore path before using the strategy on a larger group.
Explore ZaapIT Dedup ManagerBook a demo